Exclusive Clothing Sale On Flipkart

Get up to 50% off on our latest collection.

Shop Now

.NET 7 Preview 6 Announced | .NET 7 Preview 6 is now available

.NET 7 Preview 6 Announced | .NET 7 Preview 6 is now available

 In this article, we are going to discuss .NET 7 Preview 6.

follow ASP.NET Core updates in .NET 7 Preview 6  changes.

Microsoft has released .NET 7 Preview 6, just after one month after .NET 7 preview 5.

Below are a couple of enhancements of the .NET 7 Preview.

  1. Improvement in type converters,
  2. System.Formats.Tar APIs
  3. Add JSON contract customization
  4. Added constraints to NET template authoring
  5. Some of the performance enhancement

We can download .NET 7 Preview 6, for Windows, Linux, and macOS.

This .Net 7 preview 6 Tested on the visual studio 17.3 preview 3.

Type Converters

Microsoft team did some improvements in primitive types including int128, Uint128, TimeOnly, DateOnly, and Half.

Type Converter's implementation is like the below

namespace System.ComponentModel {
    public class Int128Converter: System.ComponentModel.BaseNumberConverter {
        public Int128Converter() {}
    }
    public class UInt128Converter: System.ComponentModel.BaseNumberConverter {
        public UInt128Converter() {}
    }
    public class TimeOnlyConverter: System.ComponentModel.TypeConverter {
        public TimeOnlyConverter() {}
    }
    public class DateOnlyConverter: System.ComponentModel.TypeConverter {
        public DateOnlyConverter() {}
    }
    public class HalfConverter: System.ComponentModel.BaseNumberConverter {
        public HalfConverter() {}
    }
}
C#

Explanation with Example

TypeConverter Converterint128 = TypeDescriptor.GetConverter(typeof(Int128));
Int128 ? _int128 = Converterint128.ConvertFromString("123456") as Int128 ? ;

TypeConverter ConverterUInt128 = TypeDescriptor.GetConverter(typeof(UInt128));
UInt128 ? _uint128 = ConverterUInt128.ConvertFromString("123456")

TypeConverter ConvertertimeOnly = TypeDescriptor.GetConverter(typeof(TimeOnly));
TimeOnly ? _time = ConvertertimeOnly.ConvertFromString("12:00:00") as TimeOnly ? ;

TypeConverter ConverterdateOnly = TypeDescriptor.GetConverter(typeof(DateOnly));
DateOnly ? _date = ConverterdateOnly.ConvertFromString("2022-14-07") as DateOnly ? ;

TypeConverter Converterhalf = TypeDescriptor.GetConverter(typeof(Half));
Half ? _half = Converterhalf.ConvertFromString(((Half)(3)).ToString()) as Half ? ;
BASIC

2. System.Formats.Tar APIs

Microsoft team did some improvement in System.Formats.Tar APIs assembly. This assembly was introduced in Preview 4. it helps us in manipulating TAR archives.

This enhancement was done to cover a couple of special cases

  1. Writing and reading changes -- The Format property was removed from TarReader because no archive is expected to have all its entries in a single format.
  2. Entry format, not archive format —- The team discovered that entries of different formats can be intermixed in a single TAR archive, so the LarFormat enum was renamed to TarEntryFormat.
  3. Global Extended Attributes specialized class — a new class was added to describe a GEA entry.

3. JSON contract customization

Microsoft team did an improvement in JSON contract customization. In some cases, developers need to serialize or de-serialize the JSON, which they don't want to, but they do because either those JSON comes from an external library.

JSON Contract customization allows developers more control over serialized or deserialized.

Now for JSON customization, developers no need to use JsonSerializerOptions.TypelnfoResolver and require assigning resolver.

Developers can use JSON customization by using DefaultJsonTypeInfoResolver and adding their modifier, all modifiers will be called serially,

JsonSerializerOptions Jsonoptions = new() {
    TypeInfoResolver = new DefaultJsonTypeInfoResolver() {
        JsonModifiers = {
            (JsonTypeInfo jsonTypeInfo) => {
                // your modifications here, i.e.:
                if (jsonTypeInfo.Type == typeof(int)) {
                    jsonTypeInfo.NumberHandling = JsonNumberHandling.AllowReadingFromString;
                }
            }
        }
    }
};


Employee employee = JsonSerializer.Deserialize < Employee > (@ "{"
    "Name"
    ":"
    "DotNetOffice"
    ","
    "Address"
    ":"
    "India"
    "}", Jsonoptions);
Console.WriteLine($ "({Employee.Name },{ Employee.Address})");


public class Employee {
    public string Name {
        get;
        set;
    }
    public string Address {
        get;
        set;
    }
}
JavaScript
  • When the type is not managed in code should return null.
  • Writing custom resolver by using System.Text.Json.Serialization.Metadata.IJsonTypeInfoResolver.
  • IJsonTypeInfoResolver can be combined with others resolver which will return first non-null value. example JsonTypeInfoResolver.Combine(new MyCustomeResolver(), new DefaultJsonTypeInfoResolver()).

4. Added constraints to .NET template authoring

Microsoft team did enhancement in .net template authoring using three ways

MultiChoice Parameters:- when we work with choice parameters, now Developers can declare more than one value in a single selection, just like Flags-style enum.

For example,

+availing in multiple forms of authentication on the web template.

+ Choosing multiple target platforms (ios, android, web) at once in the Maui templates.

you can follow the documentation for multi-choice parameters for more details.

> Constraints — .NET preview 6 introduces the Constraints to the .NET template

it allows us to define the context in the template, which helps the developer in the

template engine, to identify which template should show in commands.

for example, dotnet new list.

.NET 7 Preview 6 supports three kinds of constraints:

  • Operating System constraints limit templates based on the user OS.
  • Installed Workloads constraints require the specified .NET SDK workload which is installed before the template will be available.
  • Template Engine Host constraints limit templates based on which host is executing the Template Engine, which is usually the .NET CLI itself, or embedded scenarios like the New Project Dialog in Visual Studio.
  • Exit codes unification and reporting -- .NET 7 preview 6 release unifies exit codes reported by the Template Engine, it helps users who depend on scripting in shells to have a more consistent error-handling experience also, errors reported by the .NET CLI now include a link so developers can find more information on each exit code.

.NET 7 preview 6 contains some performance enhancement with respect to CodeGen as well.

  • CodeGen: the development team helped out with a couple of community PRs. The Changes affected dynamically PGO (profile-guided optimization), loop optimizations, and Arm64, along with other more general optimizations.

For more information, you can follow the Link

--------------------------------------------------------------------------------

Implementing Google reCAPTCHA v3 In DotNet core 6.0

 In this article, we will learn how to add Google reCAPTCHA v3 while registering to an application using Dotnet core 6.0.

reCAPTCHA v3 is called when we submit a request on-page, which means when we will click on the register button then reCAPTCHA v3 will be called.

About reCAPTCHA v3

reCAPTCHA is a free service provided by Google. It is used to make a safe website or it prevents the website from spam. The validity of reCAPTCHA v3 is for 2 minutes.

If you are looking for a new reCAPTCHA v3 then we have to re-run the reCAPTCHA v3 verification.

reCAPTCHA v3 returns a score for each request without user interaction.

reCAPTCHA v3 depends on the scoring points between 0.0 and 1.0. if the reCAPTCHA's score is near 1.0 means more trusted users and fewer chances of spam.

To Implement reCAPTCHA v3 functionality first we have to create the google reCAPTCHA account. So, let’s start with creating the reCAPTCHA account.

Google reCAPTCHA Account Setup

To create the Google reCAPTCHA Account, go to this link.

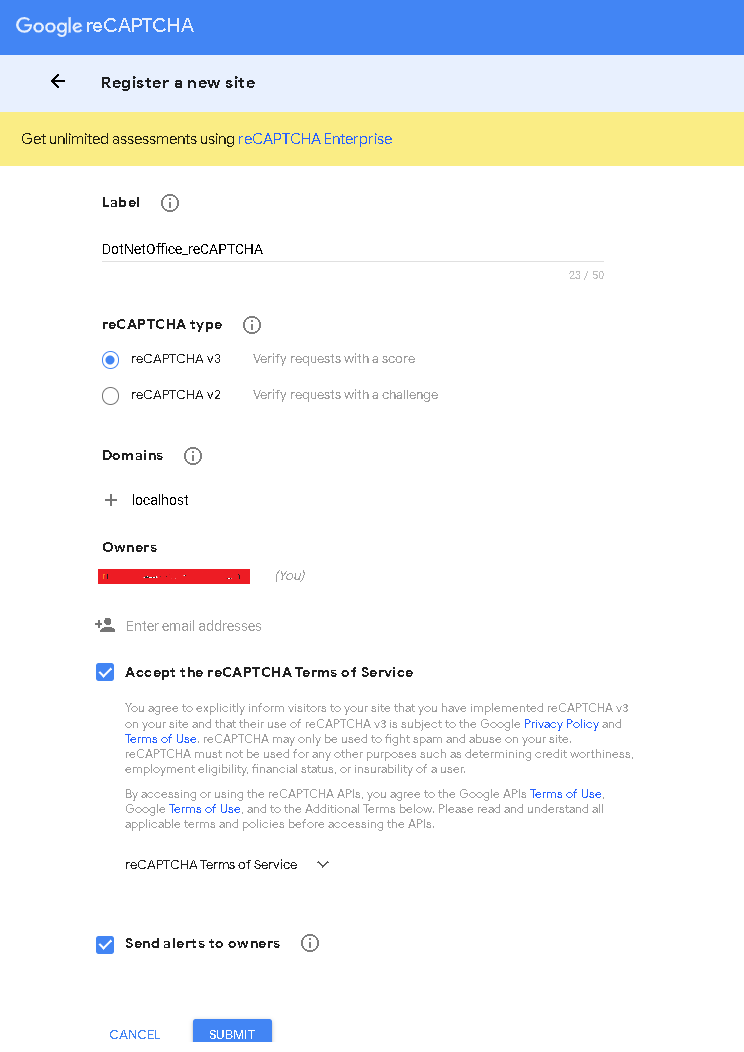
And register for a new site, for creating the reCAPTCHA account we have to follow some steps,

  1. First, give the Label Name
  2. reCAPTCHA Type (we can select either v2 or v3)
  3. Give the domain name
  4. Give the owner ( email address )
  5. Click on the check box for accepting the term and condition
  6. After giving all the fields click on submit.

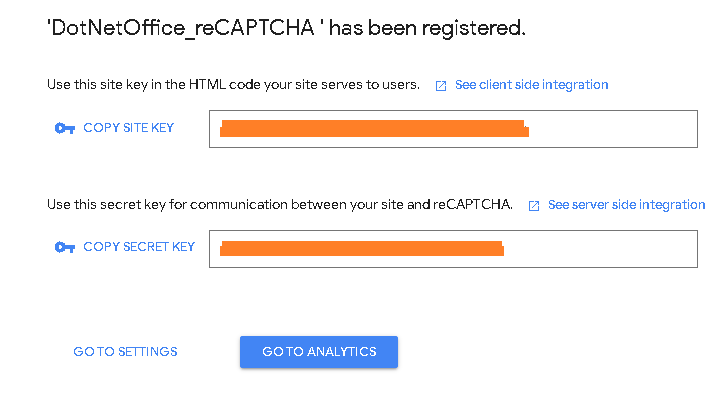
After submitting, you will get the site key and secret key, these will be used in our application. The secret key will be used to connect for server site identification, which means verifying whether the user is spam(bot) or not.

Now ReCAPTCHA is ready to use in our application.


Dotnet Core API Project

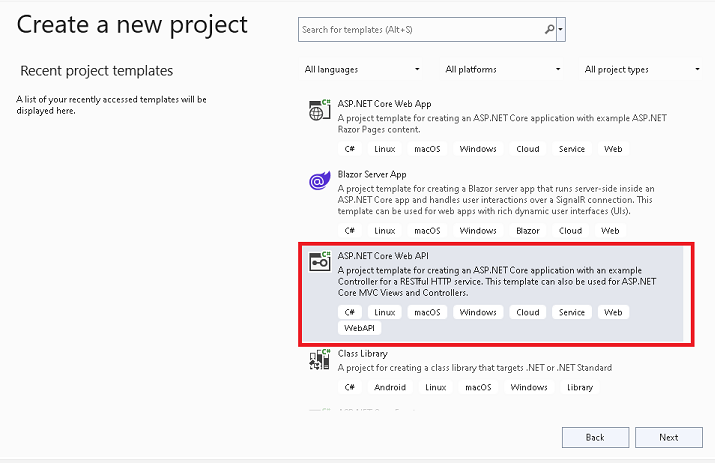
Open Visual Studio 2022 and create dotnet core web API project


Give the project name (DotNetCoreAPI)  and click next


Select Dotnet  framework 6.0 and click create


appsettings.json

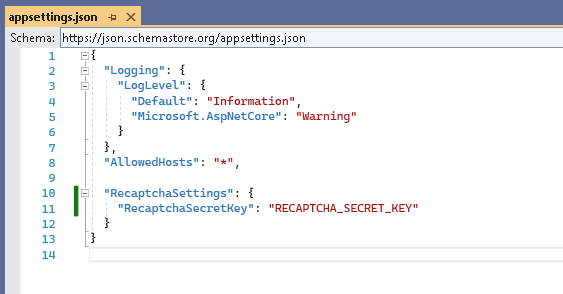
Open the appsettings.Json File and create a new section with the name of RecaptchaSettings put the secret key


{

  "Logging": {

    "LogLevel": {

      "Default""Information",

      "Microsoft.AspNetCore""Warning"

    }

  },

  "AllowedHosts""*",


  "RecaptchaSettings": {

    "RecaptchaSecretKey""RECAPTCHA_SECRET_KEY"

  }

}

JavaScript


Go to NuGet package manager and install the  Newtonsoft.json


Now create a ReCaptchaResponse class under the model folder and put below properties


using Newtonsoft.Json; 

namespace DotNetCoreAPI.Model

{

    public class ReCaptchaResponse

    {

        [JsonProperty("success")]

        public bool Success { getset; }


        [JsonProperty("score")]

        public float Score { getset; } 

        [JsonProperty("error_codes")]

        public string[] ErrorCodes { getset; }

    }

}

JavaScript


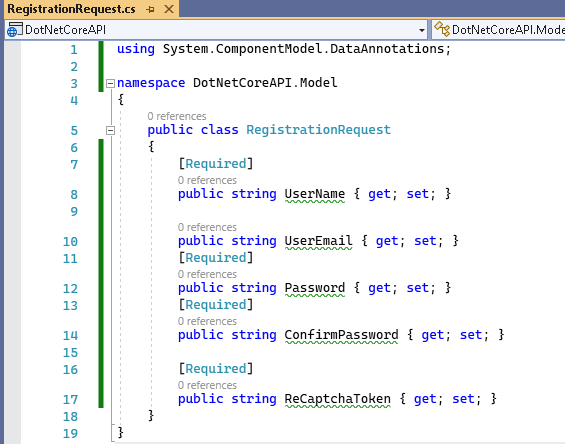
Now create a RegistrationRequest.cs Class under model folder


using System.ComponentModel.DataAnnotations; 

namespace DotNetCoreAPI.Model

{

    public class RegistrationRequest

    {

        [Required]

        public string UserName { getset; }


        public string UserEmail { getset; }

        [Required]

        public string Password { getset; }

        [Required]

        public string ConfirmPassword { getset; } 

        [Required]

        public string ReCaptchaToken { getset; }

    }

}

JavaScript


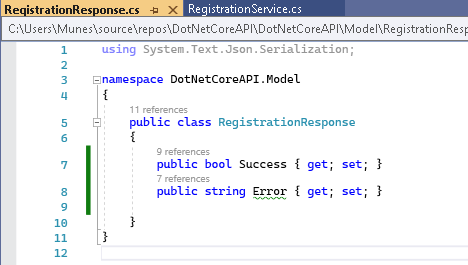
Now create a RegistrationResponse.cs  class like below


using System.Text.Json.Serialization; 

namespace DotNetCoreAPI.Model

{

    public class RegistrationResponse

    {

        public bool Success { getset; }       

        public string Error { getset; }   

        }

}

JavaScript


Now create the service folder and inside it create the IRegistration interface and create the Registration method. 

using DotNetCoreAPI.Model; 

namespace DotNetCoreAPI.Services

{

    public interface IRegistration

    {

        Task<RegistrationResponse> Registration(RegistrationRequest request);

    }

}

JavaScript


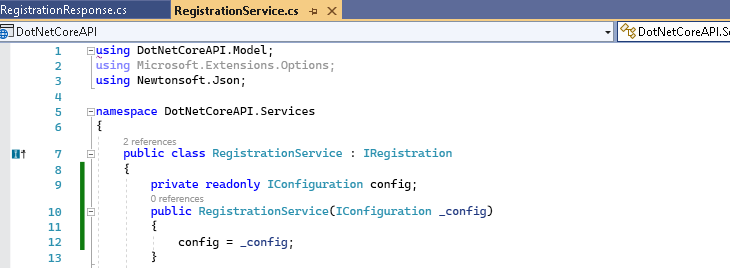
Now create the RegistrationService.cs class and inherited it from IRegistration interface.


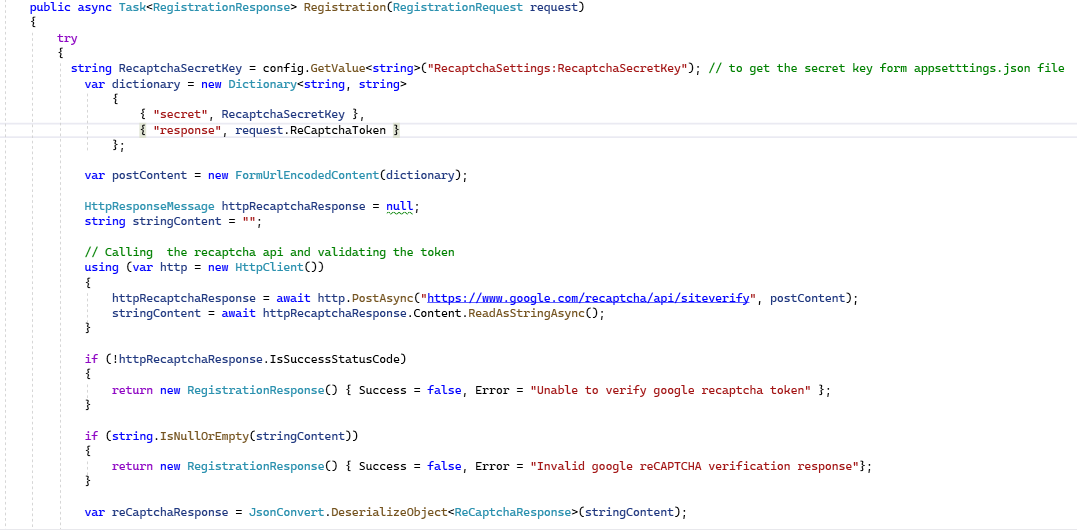
Now write the below code inside the Registration method.

This registration method contains the logic for Google reCAPTCHA verification HTTP server call with the validation.

Here in the constructor, we are injecting the IConfiguration, using it we can get the reCAPTCHA Secret Key from AppSettings.cs class.


using DotNetCoreAPI.Model;

using Microsoft.Extensions.Options;

using Newtonsoft.Json;


namespace DotNetCoreAPI.Services

{

    public class RegistrationService : IRegistration

    {

        private readonly IConfiguration config;

        public RegistrationService(IConfiguration _config)

        {          

            config = _config;

        }

        public async Task<RegistrationResponse> Registration(RegistrationRequest request)

        {

            try

            {

              string RecaptchaSecretKey = config.GetValue<string>("RecaptchaSettings:RecaptchaSecretKey"); // to get the secret key form appsetttings.json file

                var dictionary = new Dictionary<stringstring>

                    {

                        { "secret", RecaptchaSecretKey },

                        { "response", request.ReCaptchaToken }

                    };


                var postContent = new FormUrlEncodedContent(dictionary);


                HttpResponseMessage httpRecaptchaResponse = null;

                string stringContent = "";


                // Calling  the recaptcha api and validating the token

                using (var http = new HttpClient())

                {

                    httpRecaptchaResponse = await http.PostAsync("https://www.google.com/recaptcha/api/siteverify", postContent);

                    stringContent = await httpRecaptchaResponse.Content.ReadAsStringAsync();

                }


                if (!httpRecaptchaResponse.IsSuccessStatusCode)

                {

                    return new RegistrationResponse() { Success = false, Error = "Unable to verify google recaptcha token" };

                }


                if (string.IsNullOrEmpty(stringContent))

                {

                    return new RegistrationResponse() { Success = false, Error = "Invalid google reCAPTCHA verification response"};

                }


                var reCaptchaResponse = JsonConvert.DeserializeObject<ReCaptchaResponse>(stringContent);


                if (!reCaptchaResponse.Success)

                {

                    var errors = string.Join(",", reCaptchaResponse.ErrorCodes);


                    return new RegistrationResponse() { Success = false, Error = errors };

                }


                // Captcha was successful,now verify the score


                if (reCaptchaResponse.Score < 0.5)

                {

                    return new RegistrationResponse() { Success = false, Error = "It might be a boat. registration request rejected" };

                }


                return new RegistrationResponse() { Success = true };

            }


            catch(Exception ex)

            {

                return new RegistrationResponse() { Success = false, Error = "Unable to verify google recaptcha token" };

            }

        }

    }

}


JavaScript


Below is the registration method


Configure service

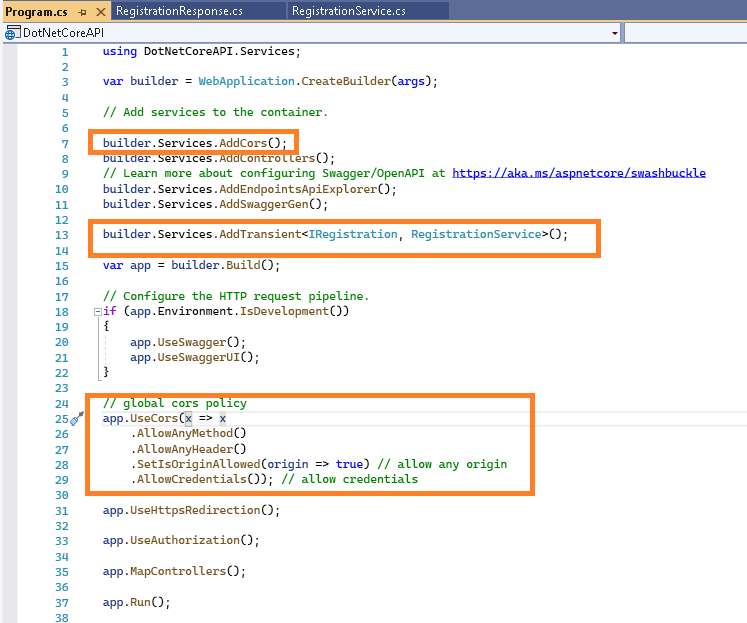
Now let’s configure the service class which we created above, to configure it, go to the program.cs class and add the below link


builder.Services.AddTransient<IRegistration, RegistrationService>();
JavaScript

And enable the Cross-origin request (CORS) by adding the UseCors method in the program file.

Create the controller

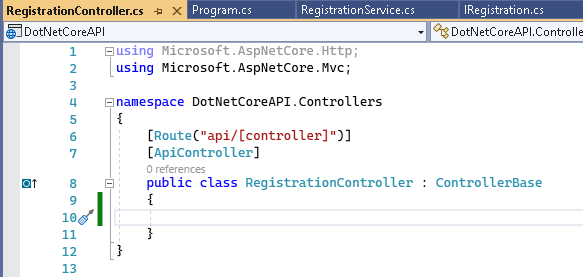
Now create the API RegistrationController class like below


Now create the registration method inside the controller like below


using DotNetCoreAPI.Model;

using DotNetCoreAPI.Services;

using Microsoft.AspNetCore.Http;

using Microsoft.AspNetCore.Mvc;


namespace DotNetCoreAPI.Controllers

{

    [Route("api/[controller]")]

    [ApiController]

    public class RegistrationController : ControllerBase

    {

        private readonly IRegistration service;


        public RegistrationController(IRegistration _service)

        {

            this.service = _service;

        }


        [HttpPost]

        public async Task<IActionResult> Registration([FromForm]  RegistrationRequest request)

        {

            if (request == null)

            {

                return BadRequest(new RegistrationResponse() { Success = false, Error = "Invalid registration request" });

            }


            if (!ModelState.IsValid)

            {

                var errors = ModelState.Values.SelectMany(x => x.Errors.Select(c => c.ErrorMessage)).ToList();

                if (errors.Any())

                {

                    return BadRequest(new RegistrationResponse

                    {

                        Error = $"{string.Join(",", errors)}"

                    });

                }

            }


            var response = await service.Registration(request);


            if (!response.Success)

            {

                return UnprocessableEntity(response);

            }


            return Ok(new RegistrationResponse() { Success = true });


        }

    }

}


JavaScript


Now run your application, and you will see a swagger window with the registration method.


Creating a UI dotnet core project


Now let's open another instance of Visual Studio 2022 and select the new project and then “ASP.NET Core Empty” like below and click Next


Give the project name and click Next


Select 6.0 dot net framework and click next


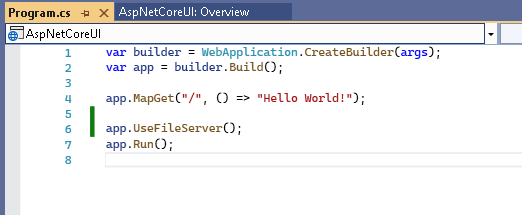
Once the project is ready for to program.cs class and add the app.UseFileServer(), it helps to read static files in the project from the wwwroot folder.


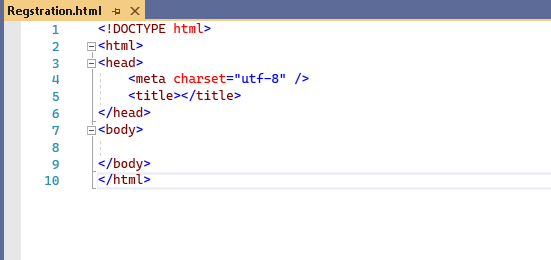
Now add a new folder name from the wwwroot folder to your project and create a Registration.html file.


Now add the below code to registration.html, and replace client key with your key


<!DOCTYPE html>

<html>

<head>  

    <title>Implementing Google reCPATCHA in dotnet core </title>

</head>

<body>


    <h1>Registration Form</h1>

    <form id="RegistrationSignup" action="" method="post">

        <input type="text" id="txtUserName" placeholder="User Name" /> <br /><br />

        <input type="email" id="txtUserEmail" placeholder=" User Email Address" /> <br /><br />

        <input type="password" id="txtUPassword" placeholder="User Password" /> <br /><br />

        <input type="password" id="txtUConfirmPassword" placeholder="Confirm User Password" /> <br /><br />

        <input type="hidden" id="hdnRecaptcha" required><br />


        <button type="submit" id="btnRegistration">Registration</button>

        <br />

        <label id="generatedToken"></label>

    </form>


    <script src="https://code.jquery.com/jquery-3.6.0.min.js" integrity="sha256-/xUj+3OJU5yExlq6GSYGSHk7tPXikynS7ogEvDej/m4=" crossorigin="anonymous"></script>


    <script src="https://www.google.com/recaptcha/api.js?render=CLIENT_KEY"></script>

    <script type="text/javascript">

        $(document).ready(function () {

            $(document).on('click''#btnRegistration'function (e) {

                e.preventDefault();

                grecaptcha.ready(function () {

                    grecaptcha.execute('6Lfb8c8gAAAAAMtMxumyvh2r-H_OeJA2FSlnUBmy', { action: 'btnRegistration' }).then(function (recaptchaToken) {

                        $('#hdnRecaptcha').val(recaptchaToken);


                        $.post("https://localhost:7058/api/Registration",

                            {

                                headers: { 'Content-Type''application/json' },

                                userName: $("#txtUserName").val(),

                                userEmail: $("#txtUserEmail").val(),

                                password: $("#txtUPassword").val(),

                                confirmPassword: $("#txtUConfirmPassword").val(),


                                reCaptchaToken: $("#hdnRecaptcha").val()


                            })

                            .done(function (result, status, xyz) {


                                $("#generatedToken").html("Token Result: " + status + " " + recaptchaToken)

                            })

                            .fail(function (result, status, error) {

                                $("#generatedToken").html("Token Result: " + status + " " + error + " " + result.status + " " + result.statusText)

                            });

                    });

                });

            });

        });

    </script>

</body>

</html>

JavaScript


Now run your application and navigate to the Registration.html page You will see on the right google reCAPTCHA icon, and it is activated on site


Now give some input to the textbox and click on register, and your token is generated. If we get the token means, the button is not clicked by the bot and it is a valid user.


    ----------------------------------------------------------------------------------------------

    Exclusive Clothing Sale On Flipkart

    Get up to 50% off on our latest collection.

    Shop Now